Eterra
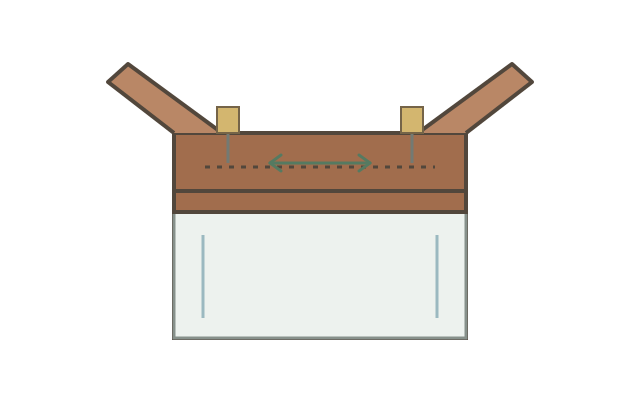
Quiet sliding doors
Glass panels move smoothly along aluminium rails for easy, quiet access.
Details for daily life
A habitat should make good care straightforward. Every part of an Eterra cabinet is planned around access, climate and the equipment that supports your animals.
01 / Daily care
Glass panels move smoothly along aluminium rails for easy, quiet access.
Feed, mist and check the enclosure from the front.
Remove the glass panels from their tracks when it is time for a thorough clean.
02 / Secure by design
Lockable glass doors help keep the enclosure closed around children, other pets and escape-prone species.
Lamps, cables and fittings sit in the canopy above the mesh, outside the habitat and away from the animals.
Carefully fitted door clearances help reduce gaps that feeders and hatchlings could pass through.
Exposed glass edges are polished as part of the door finish.
03 / Air and humidity
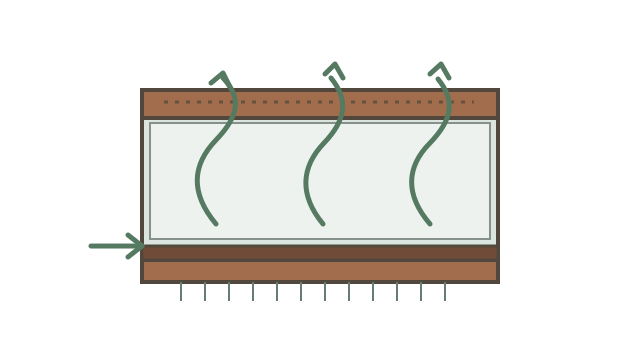
A raised front lip below the door rails acts as a low air intake; the aluminium mesh at the top provides the exhaust. This natural airflow helps limit stagnant air, mould and glass fogging, while supporting a temperature gradient and healthier breathing conditions.
The raised front lip also helps keep substrate in place when the glass doors are opened.
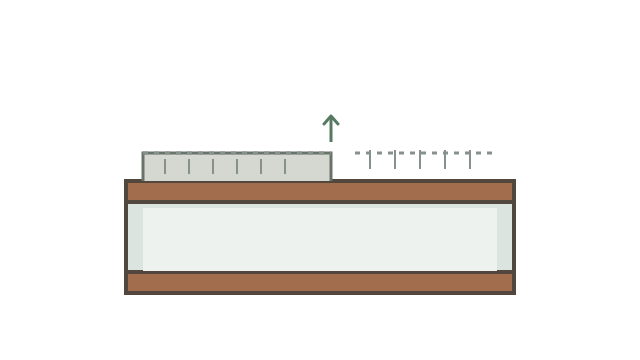
Optional 4 mm glass covers rest on top of the mesh without clips or fixings. Covering part of the mesh lets you adjust ventilation for humidity-sensitive species.
Split builds can be arranged so each enclosure is managed independently for its own climate needs.
04 / Made to work together
Two lift-up wooden flaps above each enclosure open from the front. Reach lamps and electronics without opening the habitat or disturbing the animals.
Space for thermostats, timers, misting systems and lighting, with cables kept in the canopy and outside the habitat.
Computer fans can be added for extra airflow and heat control.
The canopy mesh is made from durable, rust-free aluminium.
Finishes are selected to resist the moisture expected around a terrarium.
Wooden storage drawers can be included in the cabinet layout.
Power sockets are planned at the back of the canopy so equipment can plug in inside the cabinet, with one mains lead to the wall.
A waterproofed base detail helps protect the cabinet wood from moisture. Its maximum water-depth rating is to be confirmed.